How to Start a WordPress Blog in 5 Minutes – Step by Step

Want to learn how to start a WordPress blog in five minutes? Easy.
Bluehost is where I started my first WordPress blog almost a decade ago. They’ve now put together an exclusive deal for Blog Tyrant readers so I can help you get set up properly as well!Let’s dive right in and show you how to start your first WordPress blog today. It’s super simple and with this walk-through and video tutorial you’ll be blogging in no time!
Disclosure – The links to Bluehost on this post are affiliate links. If you make a purchase with Bluehost after clicking one of those links I will earn a commission at no extra cost to you. I have used Bluehost for years, and my commercial partnership also allows me to secure a discount rate for you.
An overview of how to start a WordPress blog
As I mentioned in my latest blog hosting review, starting a WordPress blog is super simple with BlueHost. In fact, it literally only takes a few clicks.- Brainstorm a domain name for your blog
- This is how people find your blog. Make it unique, short and memorable.
- Register your domain and sign up for a hosting package
- Your domain and blog needs to be hosted somewhere. We’ll explain below.
- Install WordPress from your new cPanel
- You can install WordPress in just a few clicks from inside your hosting panel.
- Choose a free theme for your blog
- Pick a theme that suits the colors, branding and goals for your blog.
- Start creating amazing content
- Now start writing amazing blog posts that help people.Below is a step-by-step tutorial (in both video and text formats) on how to start a WordPress blog that over 1,000 people have now used to start blogging properly!
Step 1: Purchase your WordPress hosting package
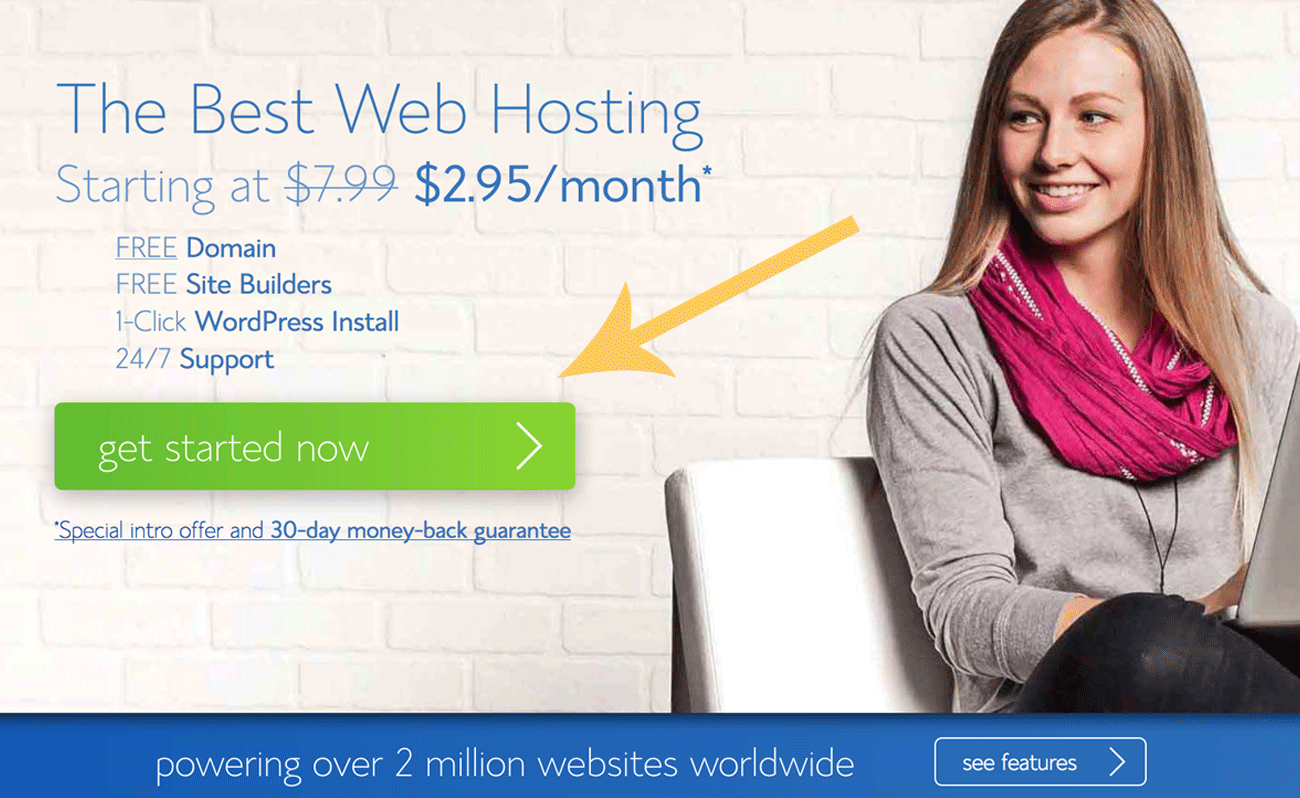
(The following images are screenshots I’ve taken from BlueHost so you know what to do. Open up BlueHost in a new window and follow along.)Click the green Get Started Now button at BlueHost to get started.
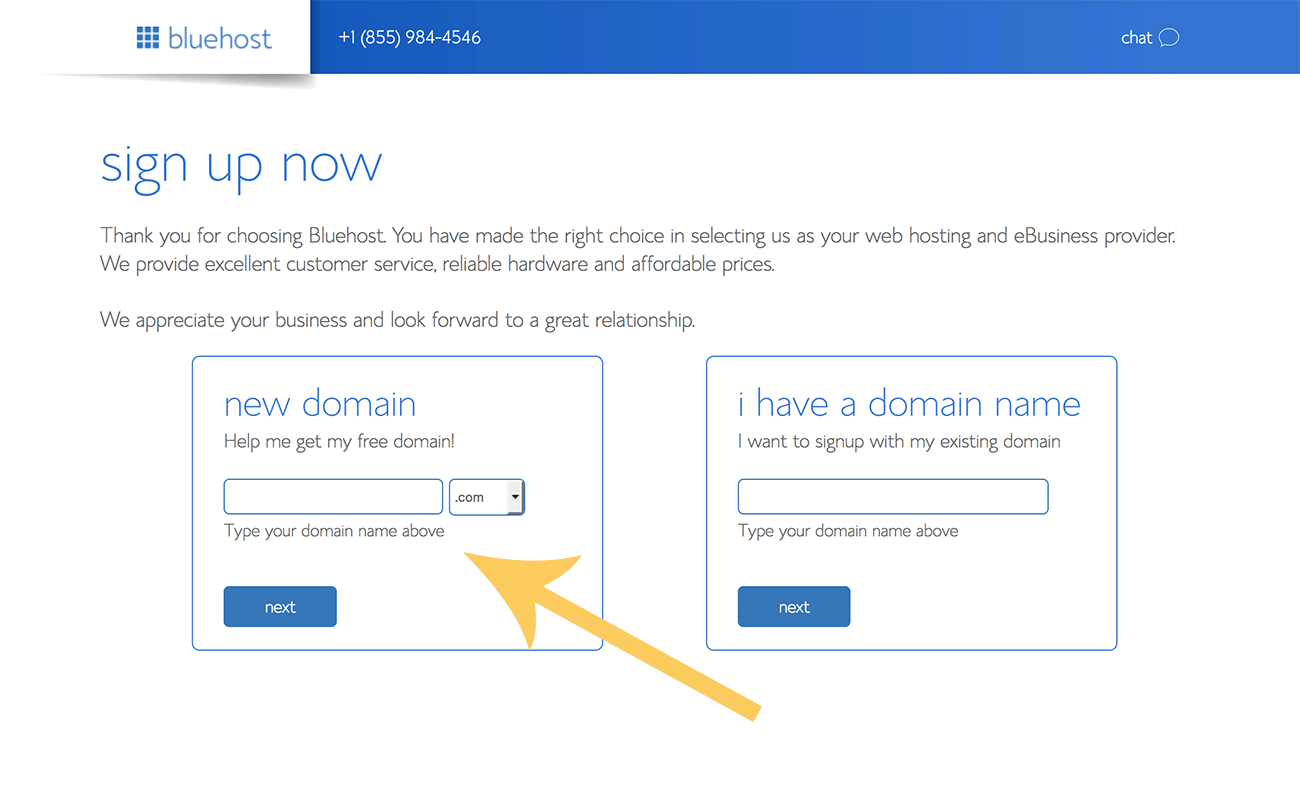
On the next page enter in the domain name that you’d like to use.
You can add unlimited websites and blogs to your BlueHost account so don’t worry too much if you’re not totally sold on your current domain name idea.
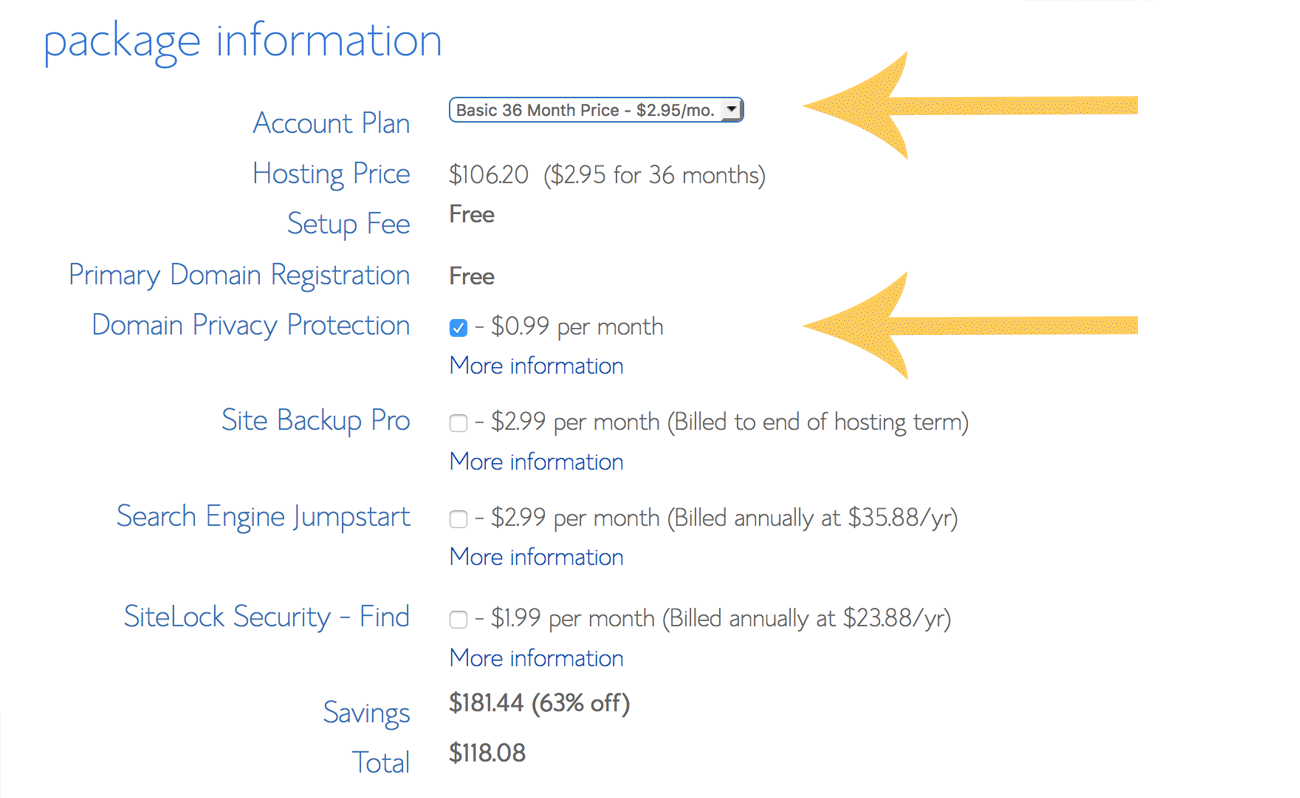
The next step is easy – just fill out all your contact details and payment information (billed annually). Make sure you use your real details so you can verify your account.
As you can see below, that same screen has some optional extras. It is up to you whether or not you purchase these but I would generally recommend you buy the Whois privacy. This keeps your details private.
Step 2: Install WordPress from your new cPanel
Now that you have purchased your domain name and hosting package you will get given access to something called a cPanel. This is the “engine” of your hosting and has dozens of different icons that link to all the different services and features that are available inside your hosting account.
At first it will seem a little overwhelming but don’t worry, you can ignore 95% of them.
IMPORTANT: I’m going to show you how to do a WordPress install by yourself but you can always ask BlueHost to do it for you. This is a message you’ll see when you first get cPanel access.
We’re going to ignore that message because installing it ourselves is easy!
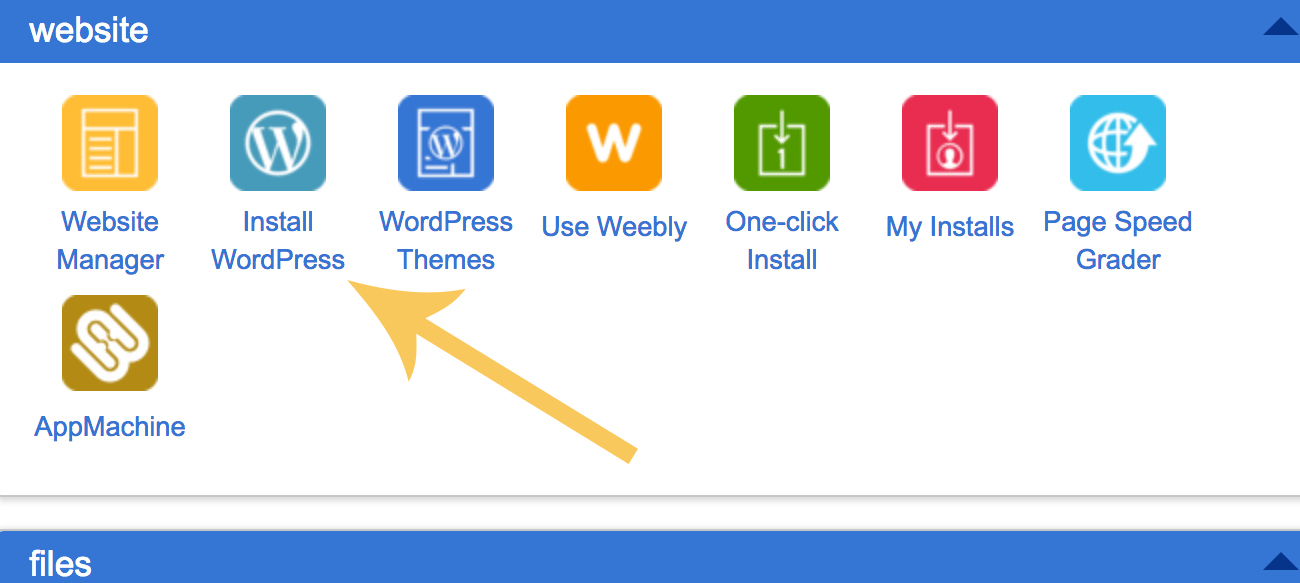
Scroll down until you find the icon called Install WordPress. This is the amazing new software that lets you install WordPress on your host in just a few clicks.
Now, the next screen has a few options but is actually really simple.
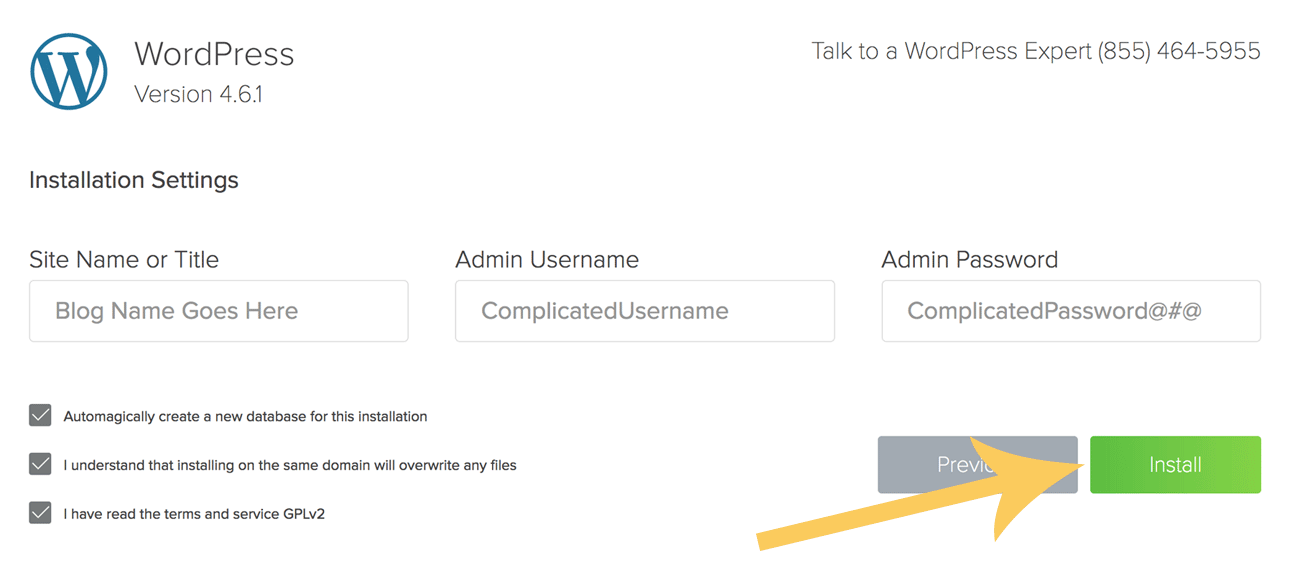
And you’re done!
Once it has finished crunching the installation it will give you a confirmation screening showing you your unique WordPress login URL that will look like this:http://yourdomain.com/wp-admin
Copy this and bookmark it and make sure you write down your username and password on a piece of paper. Never write this information down on your computer.
This URL is where you go when you want to write posts, change WordPress themes, etc. You can virtually forget about the Blue Host area for most blogging tasks these days.
That’s it!
Step 3: Change your theme and start blogging!
The final (and most rewarding) step in the process is where you install a beautiful new theme design and start writing your first posts!
To change your theme simply login to your WordPress dashboard using the URL we got above and go APPEARANCE > THEMES > ADD NEW and then use the search box to find a theme that suits your needs. There are literally thousands to choose from.
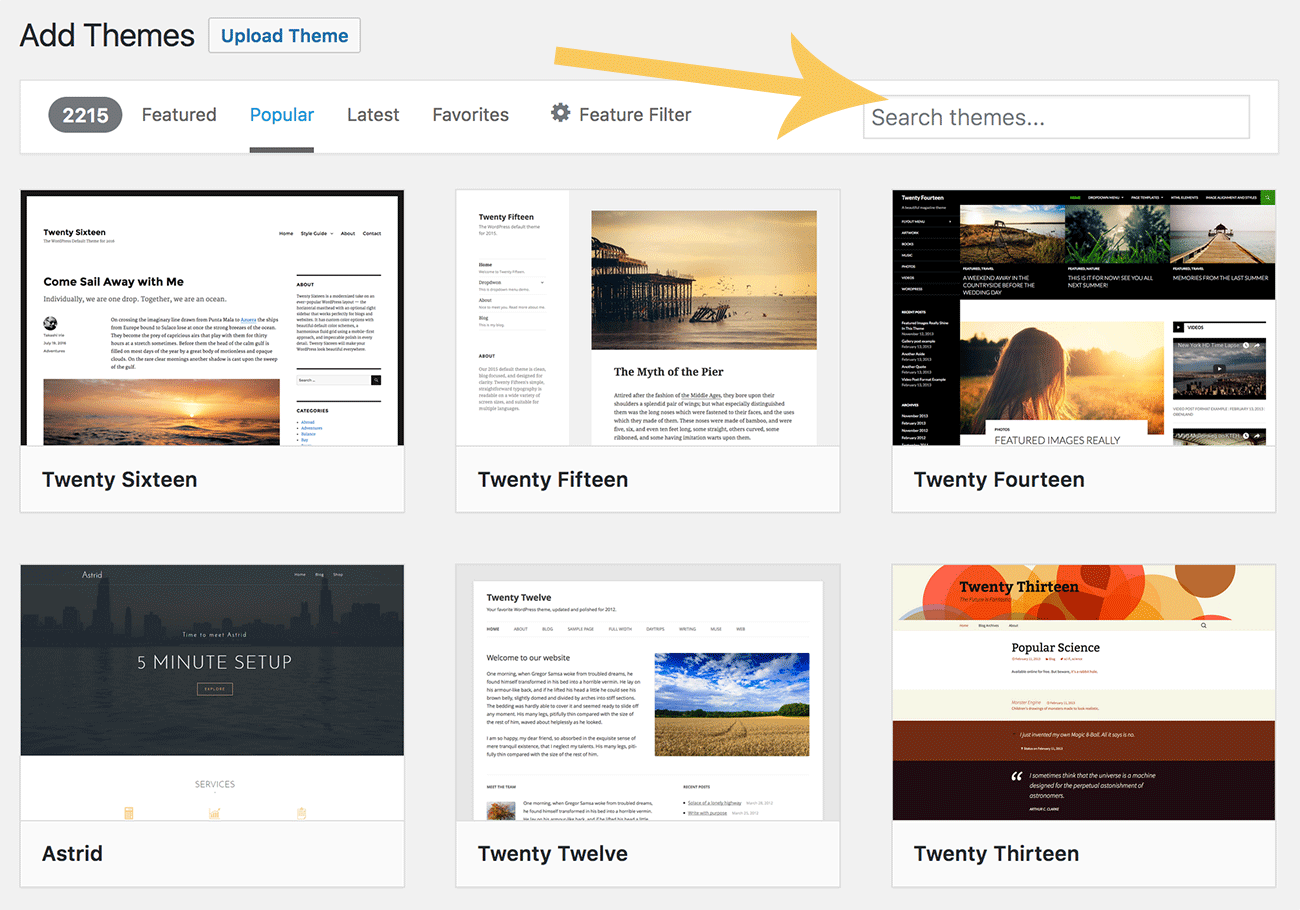
Once you have found a theme that you like you can preview it or just install it. Click the link and all the work is done for you!
Now you are ready to start blogging on your new WordPress blog! That whole process from sign up to installing a theme can literally only take five minutes to do. Just follow this guide and if you run in to any problems you can ask one of BlueHost’s amazing live support crew for help. They are there 24 hours a day.
Any questions on how to start a WordPress blog?
Comments are now closed (I close them all after 30 days) but if you have any questions or comments feel free to find me on Twitter and I’ll do my best to help you out with the process.
Post a Comment